Wednesday, September 12, 2012

Pickles : How to pickle cucumbers


 Pickles: Step by step photo instructions on how to make homemade pickles

You will need: 


 Pickling juice: 3 cups water, 3 cups white vinegar, 1/4 cup pickling salt, 1/4 cup sugar

Spices Per jar: 2-3 small garlic cloves, 2 hot peppers, 2-3 heads of dill, 1/2 tablespoon pickling spice

Canning supplies 

Tip: Wide mouth jars are best for pickles & smaller pickles work best


1. Cut off ends of pickles

2. Pickles should look like this after ends are cut off
 
3. Slice how you would prefer


Sandwich style pickles
Or wedge style pickles

4. Add fresh garlic, 1-2 chili peppers, pickling spice, fresh dill and pickle slices per your taste to your jar
This batch included:  Per jar: 2-3 small garlic cloves, 2 hot peppers, 2-3 heads of dill, 1/2 tablespoon pickling spice

5. Jar with spices

6. Spices & pickles combined

Example of sandwich style sliced pickles

Example of wedge sliced pickles

7. Heat lids in water to sterilize prior to processing

8. Fill pot with water start to heat, do not boil first or your jars will break. You want to add cool jars to cool water and bring to a boil together or hot jars to hot water and bring to a boil.

9. Add vinegar mix to jars. Leave a little room at the top of the jar. Do not fill to the top

 Pickling juice for this batch included: 3 cups water, 3 cups white vinegar, 1/4 cup pickling salt, 1/4 cup sugar


10. Run a knife or spatula around the jar to remove air bubbles. You may need to add more juice to the jar after this.


11. Wipe jar tops clean and dry with a paper towel

11. Add hot lid to jar and screw on ring to hold lid in place

12. Grab jar to place into canning pot

13. Place jars across from each other as you place them in the pot to balance the rack.
14. Cover & process for 10- 15 minutes. Start timing once water has reached a boil.
15. Remove after 15 minutes and place out on table to cool. Once the lid pops your seal is complete and you have pickles !!

Columnar Apple Tree Harvest


Columnar Apple Trees


I have two columnar apple trees, one I believe is a Brae burn and I can not remember the other. I purchased them from the Saturday Market in Oregon City, OR about two years ago now.

Columnar apple trees are easy to grow and a great addition to a small backyard garden. They produce a approx 40- 80 apples depending on size and type. 

They do not grow as big as normal apple trees. I have a 4 ft tree and a 5.5ft tree. This is ideal for me as the apples are within reach to pick. You can let them grow taller if you like, but they do not grow outwards or wider than pictured.

I do not recommend pots for these trees, I tried it and it worked for the 1st year, however we got some short very hot spells and it wiped out one of my trees and I had no harvest. This year they were planted in the ground and were much more tolerant to the weather and had a great production of apples.

Here are some photos from Spring - September from bloom to harvest.


April 2012
Just starting to bud

Apple blossom

5 1/2 ft tree waking up in spring

June 2012 apples are growing

5 1/2 ft Columnar apple tree harvest 2012

5 1/2 ft Columnar apple tree September 2012 Harvest

September 2012 Harvest from 4ft Columnar apple tree

4ft columnar apple tree Sept. 2012


Here is this years harvest! I have made excellent apple pie so far and some delicious apple sauce and the apples are good for eating right off the tree. I did not use any pesticide on them and I had no worms.

Saturday, July 14, 2012

Canning & Jam

Canning and making jam is work but fun! Getting the fruit in season and locally from a farm is important. The berries we got have no pesticides on them. Preserving fresh local fruit has many benefits for your health. Your getting the freshest fruit that is loaded with minerals, fiber, vitamin c, antioxidants and more. Canning fresh berries seals in the nutrient value that is present when they are fresh picked. Your local grocery stores fruit is not only double the price but the nutrient value decreases by every day they are on the shelf and they are usually from Mexico or a distant farm (not local). For even more savings try getting your berries/fruits/veggies at a local u-pick farm. 


Here's how to do it: 


1. Get/pick fresh berries 
2. Wash your berries 
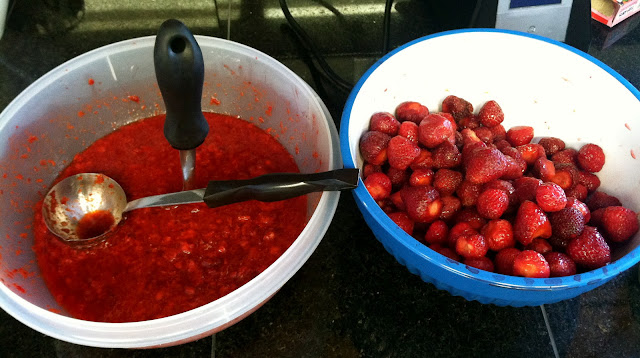
3. Sort your berries firm ones are best to can and soft are better for jam or syrup
These are soft berries that are great for syrup and jam

4. Fill your jars with berries
Nice firm berries. Fill jar full because they shrink after the canning process.


5. Make a syrup (sugar water & lemon juice (a splash to help keep berries color): 2parts water and 1-2 parts sugar depending on your taste.) Fill jars with syrup leaving an inch from the top.
5. Sterilize the lids for your jars by boiling them 
6. Wipe clean the tops of the jars, set sterilized new* lids (*you can not re-use old ones they won't seal) place ring over lid to hold in place.
7. Place your jars in the canning kettle in boiling water.
8. Leave in the kettle for 10 minutes (for raspberries) or 15-20 for cherries 
9. Pull out of kettle with canning tongs and place on the counter top on top of a towel 
End result after being canned. The berries now take up less room in the jar. 

10. You'll start hearing the lids 'pop' as they cool this assures your seal. If you touch the lid it should be sucked in and not click/bounce when pressure is applied. If your lid does not seal you need to eat them asap as they will not be preserved and store in fridge. All sealed lids can be stored on the shelf in the pantry until you decide to use them. 
Finished raspberries, cherries, and jam


JAM (freezer jam):


Get a box of pectin. There are directions on the back :

1.  Get your soft/pre- washed berries that you sorted from above. 


2. Mush the berries 
3. For each two cups strawberries or raspberries add 4 cups sugar. 
4. Boil 1 box pectin & 3/4 cups water for 1 minute. 
5. Add berry & sugar mix to the boiling pectin & water mix. 
6. Stir together and pour in jam containers. 
7. Store in freezer until ready for use.

Chickens & Ducks

The chickens & ducks are now 6  months old. The chickens have starting laying eggs ! We're still waiting on the ducks to start laying eggs which will be a month or two yet. Turns out Swedie our black duck turned out to be a boy so we have two new duck additions that are only 3 months old and were hoping we'll get females. Here's some photos to show their growth and the eggs we have been getting. The eggs started small and are getting larger by the day.